HOW TO POINT A DOMAIN NAME
Are you finding ways to point a domain from GoDaddy to Hostinger?
Moreover, you can do this method also in any web hosting if you want to migrate to Hostinger.
Also, here’s the link if you want to try the cheapest yet reliable web hosting.
Why I love Hostinger?
At this time, Hostinger is cheaper, reliable hosting for me, free domain, and SSL, which is very important if you’re selling something on the internet.
Importantly, the premium plan suits my needs, especially the unlimited hosting of the website, which is important in my web designing business.
I can host and maintain your website at a reasonable price too.
Particularly, in freelancing business, presence on the internet is very important to gain clients.
Besides, most of the clients want to scout your profile on social media or if you have a website.
If you are one of the aspiring freelancer you should check this out The 7 Essential Things You Need in Freelancing Business too.
Also, you can click the navigation button below if you want to jump to the topic.
First and foremost, there are two ways to point a domain to Hostinger.
- Changing the nameservers of your domain.
- Pointing a Domain via A record.
At this time, I will discuss the tried and tested, the easiest way of pointing your domain from GoDaddy to Hostinger. Let’s start!
Point a Domain to Hostinger
1. First, login into your Hostinger.ph Account. In addition, you can sign in using your Facebook account or Google Account too.

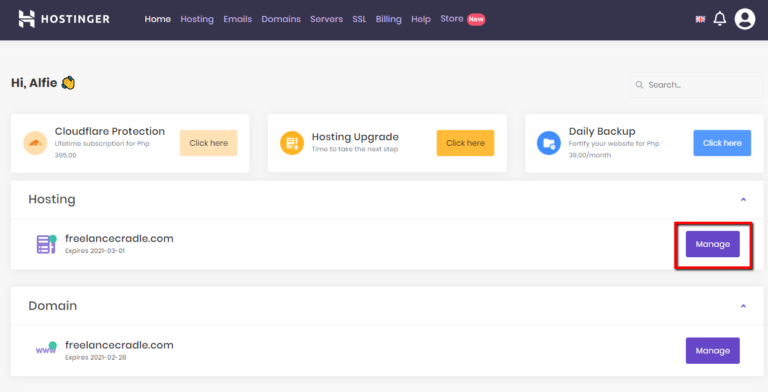
2. Second, click Manage button
3. Third, scroll down to Accounts and click the Details
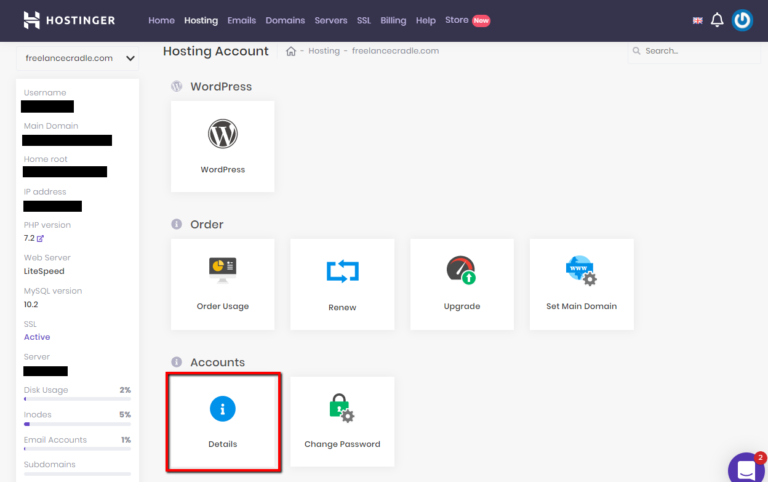
4. Finally, copy the Nameserver 1 and Nameserver 2 in your notepad

Point a Domain Out of GoDaddy
1. First, go to GoDaddy website and click Sign In
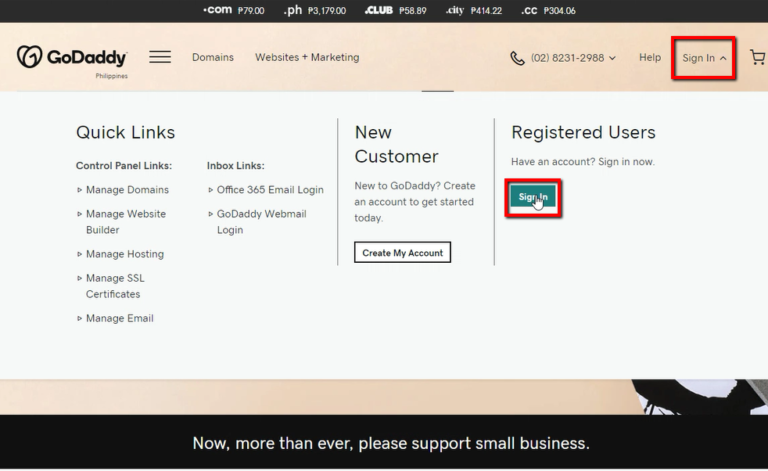
2. Second, input your GoDaddy Username and Password, then clicks the Sign In button. You can also sign in using your Facebook account or Google Account too.

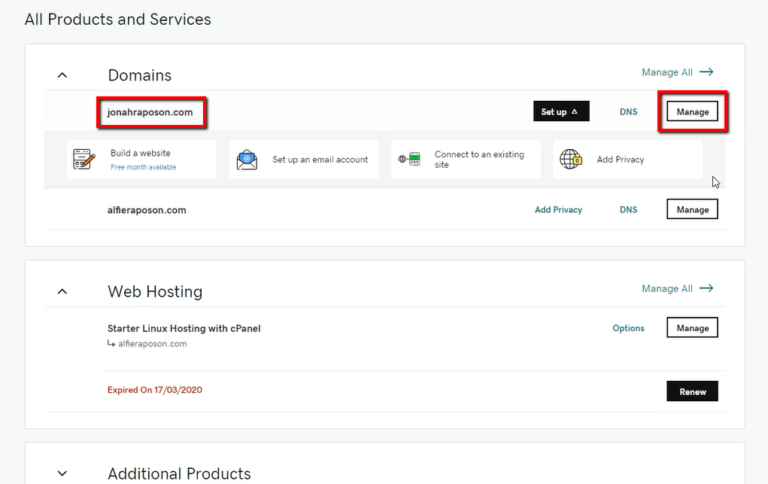
3. Third, go to Domains. Choose the domain you want to point to Hostinger then click the Manage Button
4. Then, scroll down to Additional Settings then click Manage DNS button

5. Next, scroll down to Nameservers then click the Change button. The two highlighted are the nameservers we should replace.

6. Finally, go to Connect My Domain to a Website then click Enter my own nameservers (advanced)

Transfer a Domain to hostinger
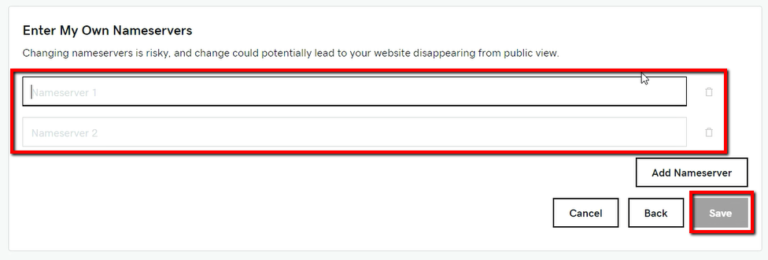
1. First, from your notepad, input the Nameserver 1 and Nameserver 2 of your Hostinger to GoDaddy Nameserver 1 and Nameserver 2. Next, click the Save button.
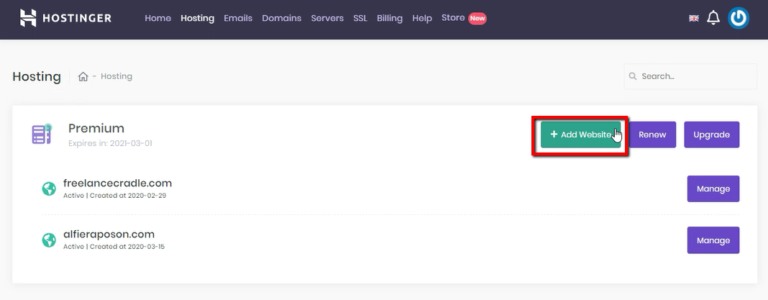
2. Second, go to Hosting tab of your Hostinger Account then click the Add Website button
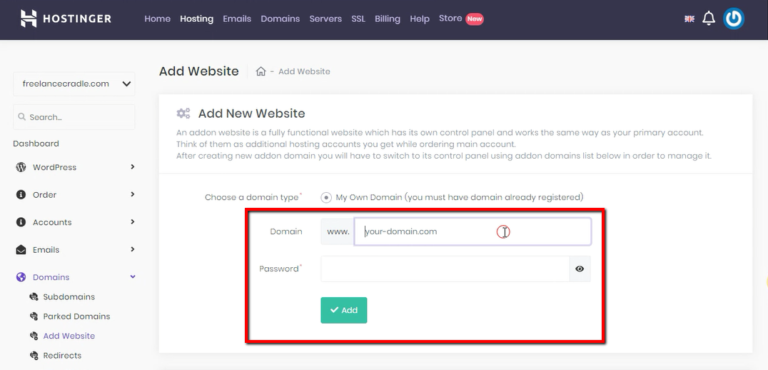
3. Third, add your domain name and key in your Hostinger password. Click the Add button.
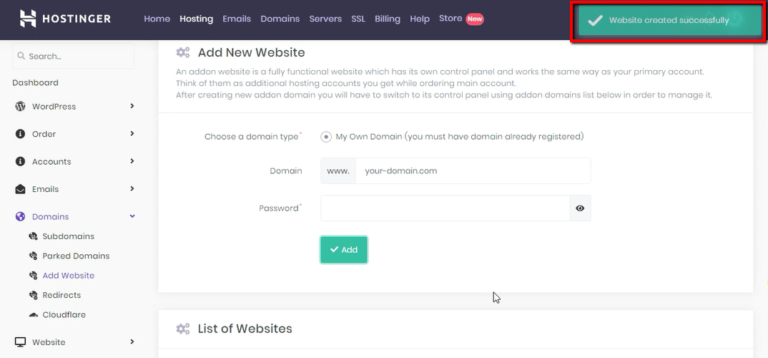
4. First and foremost, wait for this notification “Website created successfully” to make sure you’ve done it correctly.
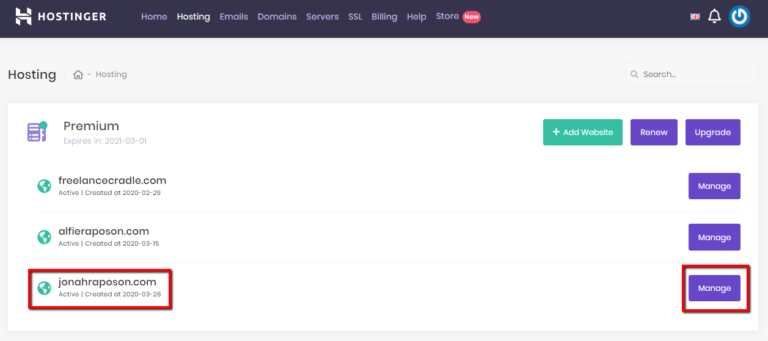
5. Last but not the least, you should see your newly added website in your Hosting tab. Click the Manage button to ensure that this website is pointing to Hostinger.
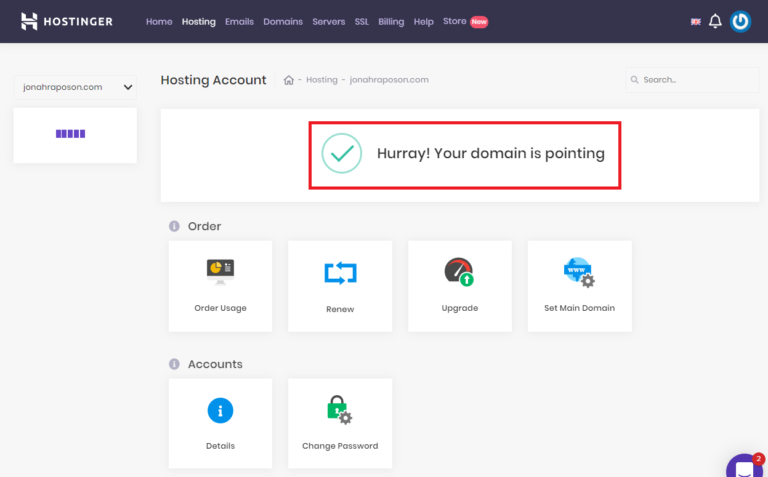
6. Finally, You should see this message “Hurray! Your domain is pointing” if your website has been added successfully.
At this time, your domain is now pointing to Hostinger. I hope this tutorial helps you in solving your problem and help you decide which hosting is right for your business too.
CONCLUSION:
In choosing the hosting that is right for you, first, you should consider your needs like for example if you want to become a web designer, you should choose a plan that has an unlimited website so that you can host many clients.
Also, consider the uptime of the hosting, it should be reliable.
Last but not the least, you can also check the processing power, disk space, bandwidth, free domain, free SSL, unlimited email accounts, control panel, and 24/7 customer support.
When I purchase the Premium plan they have a promo of free domain with SSL that is why this plan is suitable for my business.
Without a doubt, Hostinger will suit all types of the business model along with their very competitive plan.
That’s all for now if you want to see the plan of Hostinger you can check it HERE.
ABOUT THE AUTHOR

Alfie is an online Coach and a Real Estate Virtual Assistant today. Previously he is a team leader in a BPO company, and Amazon Seller Virtual Assistant. Also, he enjoys creating e-book, digital products, logo, graphics design, web design, affiliate marketing, and online coaching.


